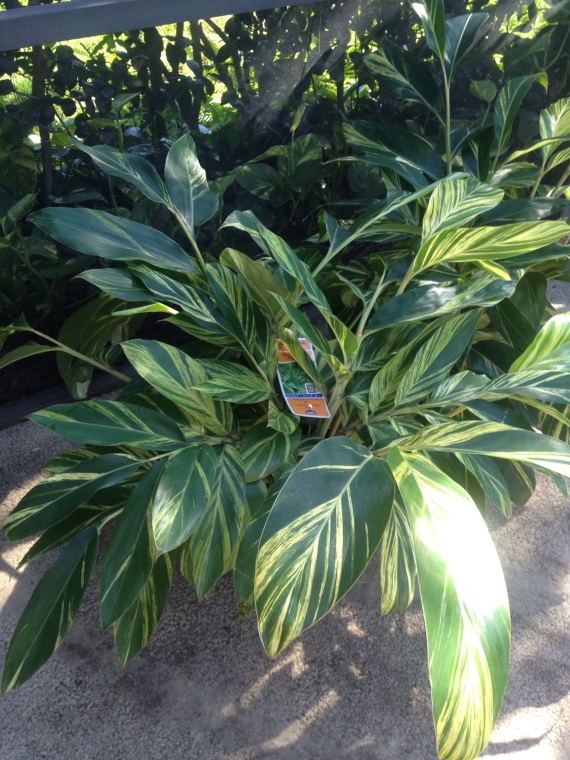
My goal for this morning’s project was straightforward. Put this plant …
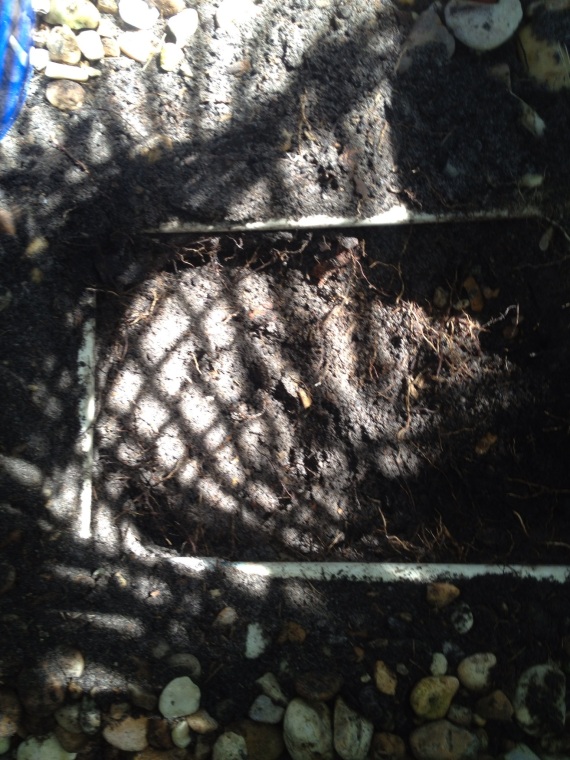
… in this space:
The plant is a Variegated Ginger Lily (Alpinia zerumbet). This ornamental plant is a close relative of the edible ginger. A native of India, this plant is a hardy perennial when planted here in Zone 9. When mature, it should reach a height of about 6 feet (~2 m), which is about half the size of the non-variegated variety.
The designated space is the back corner of a planting bed located in the back corner of our pool’s screen enclosure. This space is actually behind the other plants in this bed, so the new plant will not be the central feature of this area. We are hoping that the visually striking leaves of this plant will add a nice touch of balance and contrast to the brightly colored flowers along the front edge. As you can see, the space has some minor obstacles (rocks, dead Muhly Grass clumps, and a sprinkler head), but it doesn’t look like it should provide too much of a challenge.
The first order of business is to gather up all the tools I think I will need to get the job done:
- Bucket — I actually used three 5-gallon buckets before the job was done. I used one to hold rocks and two to hold the soil I dug out.
- Trowel — needed for obvious reasons
- Cultivator — not used much in digging the hole, but used quite a bit while preparing the new soil
- Anvil pruner — I cannot remember the last time I dug a hole around here without encountering roots, so I start by assuming they will be there. Some people might prefer the bypass type of pruners, but I have a strong preference for the anvil type. I find with these, I can make clean cuts though surprisingly thick stems and roots with remarkably little effort. I find it important to buy a fresh set periodically to make sure the blade is nice and sharp.
- Folding pruning saw — When digging, I find it saves some jangled nerves if I locate my pruning saw and have it at hand BEFORE I begin, rather than waiting until I encounter a root too thick to cut with the pruner.
- Gloves — I’ll confess that I’m about as good at keeping gloves on while I work as I was at keeping my shoes on as a kid, but I do start out with good intentions. During a project like this one they tend to go on and come off several times throughout the course of the chore.
- Hat — I like to work in this hat because its broad brim helps keep the sun off my neck as well as out of my eyes.
- Sunglasses — this is Florida, after all.
- Kneeler — the best thirty bucks I ever spent was when I bought my garden kneeler. It goes with me everywhere I go in the garden. I usually use it in the kneeling position, shown here, but occasionally flip it over to use as a bench to sit on while doing a task that’s going to take awhile, such as picking a row of bush beans. The need for this tool on a project like today’s is obvious, given the rocks and the extended time needed on the ground to dig a good-sized hole. What I find, though, is that it’s nice to have it around for those quick down-and-back-up activities that happen all the time in a garden, in that I can keep my knees off the ground, I never have to worry about painfully locating rocks and sticks with my kneecaps, and I can use the side bars as leverage when standing back up. If you don’t have one, ask yourself “why not?” When you realize you don’t have an answer, click the link at the bottom of this post to order your very own from Amazon (or just click right here
), just like I did. You won’t regret it.
- Tape measure — I actually didn’t think of this in time to get it in the picture, but I ended up using a tape measure several times. I measured the pot (9 inches in diameter and 9 inches deep) so I would know how big to make the hole, I measured to see if I had it deep enough yet (several times), and so on.
Having assembled my tools, it was time to get underway. The first thing to do was pull up the dead Muhly Grass and dispatch the remains to the compost bin. That task was finished in a couple minutes without any surprises.

Next, I had to clear away the rocks from the designated space, allowing me free access to the soil below.

After that, I had to make sure the location passed inspection. Emma looked it over and said it was fine, so I proceeded with the soil removal part of the job.

It wasn’t long until I encountered the first real surprise. There was a PVC pipe right across the middle of where I had planned to dig. And, no, it didn’t lead to the sprinkler head I pointed out in the picture above. I didn’t take the time to figure out where it did lead; I simply moved my targeted spot over a few inches to avoid it, and proceeded to dig.

I did expect to find a PVC pipe leading to the sprinkler head mentioned previously, so I was not surprised when I found it. I measured between the two pipes to make sure I still had room. With a 10 inch space and a 9 inch pot, I didn’t have much room to spare, but at least it was doable.
What I did not expect was to find yet another pipe, but I did! Fortunately, it was on the edge of where I was planning to dig, so it did not requiring moving the hole yet another time. It was the last one I encountered, so I at least had one side of the hole to work in without obstacles.
By the time I was through digging, I had accumulated quite a pile of roots. The largest one I encountered was about an inch and a half in diameter, a pine root which I hit at about seven inches below ground. This is when I was really glad I already had my pruning saw handy. It zipped through the root in a matter of seconds, and I was able to keep going without getting diverted. The rest of the roots were manageable with the anvil pruner.
Finally, it was time to start filling the hole in. Before doing anything else, I used my measuring tape once again to locate the center of the intended space. Ginger Lily needs to have good drainage, so before establishing the soil base, I placed several rocks at the bottom of the hole to help drain water away from the plant.

I then poured on a layer of vermiculite to fill in the spaces between the rocks, thereby keeping the soil from settling into the spaces and preventing good drainage.

After that, I placed a layer of peat moss and about a cup of Plant Tone organic fertilizer, followed by a mixture of peat, vermiculite, compost, and potting soil. I used this to fill the hole back up to the 9 inch mark, so that the base of the plant would be at ground level when finished. Finally, with the hole completely prepared, I carefully removed the plant from the pot (finding it to be moderately root-bound), and placed it gently into the hole. I then filled in the spaces around the plant with the potting soil/peat moss/vermiculite mixture.

After replacing the rocks, doing a little clean-up, and watering it well, my task was complete. I had successfully placed a round plant in a square hole!!

Here’s a view of the planter bed from the front side. You can barely make out the Ginger Lily to the left of the palm, near ground level. As mentioned earlier, it should get considerably larger than this, so by the time it is grown, it should be quite visible from the front side.

And here’s what it looks like from across the pool.
As discussed above, the best thirty bucks I ever spent was when I bought the garden kneeler. I looked around quite a bit before selecting one. I compared options and suppliers, and read online reviews. The one I picked is the Yard Butler GKS-2 Garden Kneeler, which I bought from Amazon.com. This is neither the cheapest nor the most expensive, but it seemed to offer the best value. A few months ago, I bought a second one — not because the first one was worn out, but because my wife and I were tired of having to juggle only one of them between us! So, we now have two, and we’re both happy.
Here’s a link to the model I use (simply click on the picture):
Two other tools I used today that you might find handy if you’re doing a similar project are the anvil pruner and the folding pruning saw. I actually bought mine at K-mart a few days ago, since I happened to be there and knew that I needed them. They made really short work of all those roots, and made the task about as effortless as I could imagine. Because I was so pleased with them, I’m providing links below to the same model products at Amazon.
Happy gardening!


Posted by Angeline M on July 3, 2012 at 12:05 am
No wonder your garden is so beautiful! I would have given up when I saw the rocks! Good work!
Posted by Skip Slone on July 3, 2012 at 1:49 am
Well, I’m sure that knowing that the rocks didn’t go very deep helped. I installed them last summer, so I knew what I was in for!
Posted by on thehomefrontandbeyond on July 3, 2012 at 10:08 am
boy you are much more of a gardener than I – I would have just dug a hole with my bare hands (later I would have thought about gloves when I looked at my nails) and stuck the plant in – then again my pansies died before I got them planted and my Impatiens are on the verge – love your post – am just kidding about the bare handed thing
Posted by Skip Slone on July 3, 2012 at 10:18 am
LOL — I guess that’s the engineer in me coming out. The geek in me wants to write an app for that 😉